Product docs and API reference are now on Akamai TechDocs.
Search product docs.
Search for “” in product docs.
Search API reference.
Search for “” in API reference.
Search Results
results matching
results
No Results
Filters
Modify the DOM with JavaScript
Traducciones al EspañolEstamos traduciendo nuestros guías y tutoriales al Español. Es posible que usted esté viendo una traducción generada automáticamente. Estamos trabajando con traductores profesionales para verificar las traducciones de nuestro sitio web. Este proyecto es un trabajo en curso.
The Document Object Model (DOM) is a programming interface for HTML web pages. Scripting languages, like JavaScript, can access and manipulate the DOM to alter the display of a web page. In this guide, you learn about the methods and properties you can use to modify the DOM by adding and removing element nodes. You also learn how to use specialized properties to assign and update a DOM element’s CSS styles.
If you are not familiar with the DOM, refer to our An Introduction to the Document Object Model (DOM) and Traversing the Document Object Model with JavaScript guides before continuing with this guide.
Before You Begin
To follow along with the examples in this guide, use your web browser’s developer tools JavaScript console to interact with the DOM.
- On Chrome, refer to Google’s Open Chrome DevTools documentation to learn how to access their developer tools.
- On Firefox, refer to Mozilla’s Open the Inspector documentation to learn how to access their developer tools.
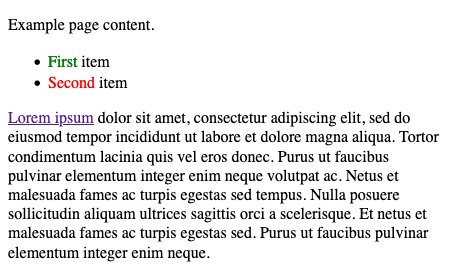
Most of this guide’s examples are based on an example web page created from the HTML source code displayed below. To follow along with this guide’s examples, view the rendered example web page in your browser as you read through the guide.
- File: example-page.html
 1
 2
 3
 4
 5
 6
 7
 8
 9
10
11
12
13
14
15
16
17
18
<!DOCTYPE html> <html> <head> <title>Example Page</title> </head> <body> <div id="first-div" class="content-div"> <p>Example page content.</p> <ul> <li><span class="numeral-name" style="color: green;">First</span> item</li> <li><span class="numeral-name" style="color: red;">Second</span> item</li> </ul> </div> <div id="second-div" class="content-div"> <p><a href="https://loremipsum.io/">Lorem ipsum</a> dolor sit amet, consectetur adipiscing elit, sed do eiusmod tempor incididunt ut labore et dolore magna aliqua. Tortor condimentum lacinia quis vel eros donec. Purus ut faucibus pulvinar elementum integer enim neque volutpat ac. Netus et malesuada fames ac turpis egestas sed tempus. Nulla posuere sollicitudin aliquam ultrices sagittis orci a scelerisque. Et netus et malesuada fames ac turpis egestas sed. Purus ut faucibus pulvinar elementum integer enim neque. <em>Amet consectetur adipiscing elit ut aliquam.</em></p> </div> </body> </html>
How to Create and Remove DOM Elements
To make a web page dynamic, you use JavaScript to alter the elements that make up the web page’s DOM. Typically, the DOM is altered by programmatically creating new HTML elements or moving specific elements or attributes.
The sections below show you how to use JavaScript to create and remove elements from the DOM. You also learn how to control the way in which new elements are added to the DOM using a few specialized JavaScript methods.
Creating Element Nodes
The DOM represents the elements and content of an HTML document as nodes and objects. You can create element nodes in the following two ways:
- Using a
documentobject method to create the element and to append the new node - Changing the value of the
innerHTMLproperty on a parent node
Depending on what you are trying to achieve, you might choose one approach over another. The following sections provide examples for each approach and information on when to use them.
Using the createElement() Method
The document object has several built-in methods for creating new nodes, like the createElement() method. This method is especially convenient when you want to create multiple elements or are working programmatically with numerous elements.
The list below includes an overview of the steps used when creating a new element using JavaScript.
- The
createElement()method accepts the tag name of the element to create as a parameter. It creates the specified tag without any content contained within the tag. - Once you’ve created a new element, you have access to properties or additional methods of the element object that can be used to style the element, populate it with text, and achieve many other enhancements. The How to Modify Element Attributes discusses these changes in greater depth.
- When your new element looks and behaves the way you intend, you can add the element node to the DOM’s target parent node. For example, you can use the
appendChild()method to achieve this. The Inserting Element Nodes discussesappendChild()and other methods you can use to insert an element into the DOM.
The example below demonstrates the steps used to create and add a new element to the DOM using the createElement() method. You can run the JavaScript code on the
example page
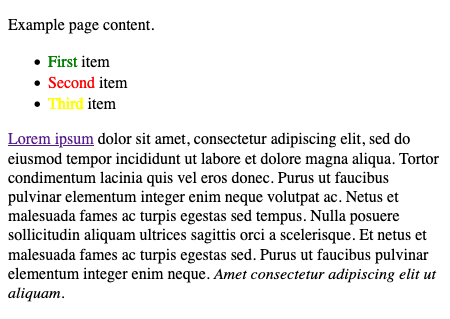
using your browser’s developer console. The JavaScript code creates a new li element and a new span element. After adding some styling and text to these new elements, the commands append the elements as children of the existing ul element.
// Creates the new span element, assigns its class, sets its
// color, and finally gives the element some text content
const new_span_element = document.createElement("span");
new_span_element.classList.add("numeral-name");
new_span_element.style.color = "yellow";
new_span_element.textContent = "Third";

// Creates the new li element, adds the span element to it,
// and adds some additional text content.
const new_li_element = document.createElement("li");
new_li_element.appendChild(new_span_element);
new_li_element.append("item");

// Appends the new li element to the existing ul element,
// which adds the new elements to the visible DOM.
const ul_element = document.getElementsByTagName("ul")[0]
ul_element.appendChild(new_li_element);
The result of executing the JavaScript on the example page resembles the following:

Using the innerHTML Property
You can use the innerHTML property to add HTML elements to the DOM. This property is available on the document object and any element object that is a part of the DOM.
The innerHTML property stores a string representation of the DOM’s HTML. This means that you can use this property to overwrite existing content, create entirely new content, or manipulate content using string manipulation.
However, the innerHTML property does not give you convenient means for modifying child elements and nodes, since it represents everything in one, often long, string.
For this reason, the innerHTML property is useful when you need to make large and sweeping changes to several elements. It is not as useful when you want to create child elements systematically, or when you want to do so in an iterative loop.
The example below demonstrates the typical steps used to create and add a new element to the DOM using the innerHTML property.
You can run the JavaScript code on the
example page
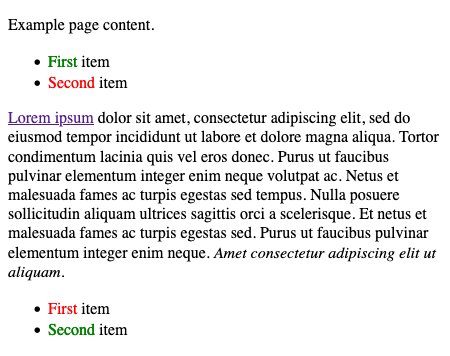
using your browser’s developer console. The JavaScript creates a new ul element and child li elements, each with its own containing text.
// Fetches the second-div element, then extends its innerHTML with a new
// ul element. Observe that this requires rewriting the innerHTML.
const second_div_element = document.getElementById("second-div");
second_div_element.innerHTML = second_div_element.innerHTML + "<ul></ul>";

// Fetches the new ul element and writes two new li elements to its
// innerHTML, complete with classes, attributes, and text content.
const second_ul_element = document.querySelector("#second-div > ul");
second_ul_element.innerHTML = `<li><span class="numeral-name" style="color: red;">First</span> item</li>
<li><span class="numeral-name" style="color: green;">Second</span> item</li>`
The result of executing the above JavaScript commands on the example page resembles the following:

On its own, using the innerHTML property to add new elements to the DOM can result in verbose code. Thus, even when you need to use the innerHTML property, it works best when combined with element creation methods, like createElement().
The example below uses both the innerHTML property and the createElement() method to achieve the same results as the previous example, with much less code.
// Adds the new ul element to the second-div element.
const new_ul_element = document.createElement("ul");
document.getElementById("second-div").appendChild(new_ul_element);

// Writes the two new li elements to the new ul element.
new_ul_element.innerHTML = `<li><span class="numeral-name" style="color: red;">First</span> item</li>
<li><span class="numeral-name" style="color: green;">Second</span> item</li>`
Removing Element Nodes
There are two methods available to remove an element from the DOM: the remove() method and the removeChild() method. The remove() method completely removes the selected element node from the DOM, while the removeChild() method removes the child node of the selected element node.
Each element within the DOM has a
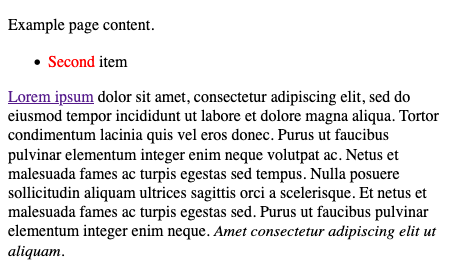
remove()method that allows you to remove the element node from the DOM. For instance, using the HTML from the example page , the code below removes theemelement from thepelement in thesecond-div:const second_div_em_element = document.querySelector("#second-div em"); second_div_em_element.remove();
The
documentobject and each element have aremoveChild()method. This lets you specify a child node that you want to remove. For instance, the code below removes the firstlielement from theulelement contained within thefirst-div:const first_div_ul_element = document.querySelector("#first-div > ul"); const first_ul_li_element = first_div_ul_element.getElementsByTagName("li")[0]; first_div_ul_element.removeChild(first_ul_li_element);
Inserting Element Nodes
Before a new element is displayed on a web page, it must be explicitly added to the DOM. In the
Using the createElement() Method
section, this was achieved using the appendChild() method. There are, in fact, two more methods you can use to add an element to the DOM: the insertBefore() and the replaceChild() methods. These two methods let you specify where to insert an element, giving you finer control over modifying the DOM.
Below, you can find examples that use each method to insert an element node into the DOM. Each example modifies the HTML displayed below.
<ul>
    <li id="first-item">First item</li>
    <li id="second-item">Second item</li>
</ul>
The JavaScript below assigns the <ul> element and its contents to the ul_element variable.
const ul_element = document.getElementsByTagName("ul")[0];
Each example uses the ul_element variable.
The
appendChild()method adds a new node to the end of the designated parent node. For example, the code below adds a third<il>element to the existing<ul>element.const third_li_element = document.createElement("li"); third_li_element.textContent = "Third item"; ul_element.appendChild(third_li_element);The
insertBefore()method adds the new node before an existing node. The inserted node becomes the child of the targeted parent node. This next example adds an item to theul_elementbefore thefirst-itemelement.const zero_li_element = document.createElement("li"); zero_li_element.textContent = "Zero item"; const first_li_element = ul_element.querySelector("#first-item"); ul_element.insertBefore(zero_li_element, first_li_element);The
replaceChild()method replaces an existing child node with a new child node. You can see this here with thezero_li_elementcreated above being replaced with a new item:const not_first_li_element = document.createElement("li"); not_first_li_element.textContent = "First negative item"; ul_element.replaceChild(not_first_li_element, zero_li_element);
After running, in sequence, all the JavaScript examples from this section, your HTML should have been updated to resemble the following:
<ul>
    <li>First negative item</li>
    <li id="first-item">First item</li>
    <li id="second-item">Second item</li>
    <li>Third item</li>
</ul>
How to Modify Element Attributes
All HTML elements can have attributes which provide additional information about the element. In the DOM, attributes are represented as nodes and can be added to the DOM in the same way that you add element nodes. For instance, you can use the createAttribute() method to add an attribute to an element node, much in the same way that you
use the createElement() method
.
The document object also has a set of specialized properties that handle the specific needs of attributes. For example, it includes some dedicated properties that deal with attributes like classes and styles. These specialized attributes are discussed below in their own dedicated sections.
The next sections show you how to set and change an element’s attributes using the DOM’s attribute properties.
Setting Attributes
The setAttribute() method lets you assign an attribute’s value, whether or not it has already been set. The method is available on any element node and takes two arguments: the attribute name and its value.
For example, using the JavaScript shown below, you can add an id attribute to the first li element of the first-div found on the
example page
. Use your browser’s developer console to execute the example JavaScript.
const first_div_li_element = document.querySelector("#first-div li");
first_div_li_element.setAttribute("id", "first-li");

console.log(first_div_li_element);
<li id="first-li">Checking for Attributes
When you start working with element attributes, you often need to check if an element already has a value set for a given attribute. This can be achieved with the hasAttribute() method. After that, you may also need to know a given attribute’s current value. This can be done with the getAttribute() method.
The example JavaScript below uses the hasAttribute() and the getAttribute() methods to verify that the selected <span> element has an assigned class attribute. If it does have an assigned class attribute, the browser’s developer console displays its class attribute’s value.
const first_div_span_element = document.querySelector("#first-div span");
if (first_div_span_element.hasAttribute("class")) {
    console.log(first_div_span_element.getAttribute("class"));
}
numeral-nameRemoving Attributes
You can remove any existing attribute from an element object using the removeAttribute() method. The removeAttribute() method accepts the attribute to remove’s name as an argument.
For example, use the removeAttribute() method to delete the id attribute added to the first_div_li_element in the
Setting Attributes
section above.
first_div_li_element.removeAttribute("id")'
console.log(first_div_li_element)
<li>Styling Attributes
Style attributes are not as straightforward to modify. This is because the single attribute, style, can actually hold numerous properties of its own. The setAttribute() method only lets you redefine the style attribute’s value, not adjust the values of its individual properties.
For instance, you can use the setAttribute() method to assign several properties to an element’s style attribute, expressing them as a single string:
const first_p_element = document.querySelector("#first-div > p");

first_p_element.setAttribute("style", "font-weight: bold; text-align: center;");

console.log(first_p_element.style);
{ "font-weight" → "bold", "text-align" → "center" }However, if you then want to adjust only one of those style properties, the setAttribute() method’s arguments are quite verbose.
first_p_element.setAttribute("style", "font-weight: normal;");

console.log(first_p_element.style);
{ "font-weight" → "normal" }To remedy this, JavaScript allows you to adjust the style attribute, and its individual properties, via the style property. This property makes available all of the CSS style properties of the style attribute, letting you set and adjust each one independently.
font-weight and text-align become fontWeight and textAlign, respectively, in JavaScript.The example below accomplishes the same style changes that were attempted with the setAttribute() method in the example above:
first_p_element.style.fontWeight = "bold";
first_p_element.style.textAlign = "center";
console.log(first_p_element.style);

first_p_element.style.fontWeight = "normal";
console.log(first_p_element.style);
{ "font-weight" → "bold", "text-align" → "center" }
{ "font-weight" → "normal", "text-align" → "center" }
Class Attributes
Class attributes present another special challenge when using JavaScript to modify this attribute. An element can have one or more classes, and sometimes you may find the need to work with them individually. This is especially the case with modern CSS frameworks, where you may need to check for a particular class and toggle it on or off.
The classList property has several methods that help you modify an element’s class attribute. The property itself returns a list of the classes available to an element node.
Checking for Classes
You can check to see whether an element has a given class using the contains method on the classList property.
The example below checks whether the p element in the second-div has the active class:
const second_p_element = document.querySelector("#second-div > p");
console.log(second_p_element.classList.contains("active"));
falseToggling Classes
Some classes, especially with modern CSS frameworks, require toggling for you to achieve the desired behavior for an element on a web page. For instance, the active class is often used to highlight an element. Being able to toggle the class via JavaScript could allow you to have a button that toggles highlighting on the element.
The example below uses the second_p_element object defined in the
Checking for Classes
section. Recall that the element here does not have the active class assigned to it. For this reason, toggling the class adds the active class to the element.
second_p_element.classList.toggle("active")
console.log(second_p_element.classList.contains("active"));
trueIf the element already has the class, toggling removes the class.
second_p_element.classList.toggle("active")
console.log(second_p_element.classList.contains("active"));
falseAdding and Removing Classes
In some cases, you may want to permanently add or remove a class, rather than toggle it “on” and “off”. Using the toggle() method for this purpose, would first require using the contains() method to determine whether the class is already present or not.
Instead, you can use the add() and remove() methods. These methods are straightforward and do not require any knowledge of the current classes on an element.
The example below first adds and then removes the button class from the a element in the second-div. This is another class often used by modern CSS frameworks, usually to add an anchor link to a button’s styling.
const a_element = document.querySelector("#second-div a");

a_element.classList.add("button");
console.log(a_element.classList);
[ "button" ]a_element.classList.remove("button");
console.log(a_element.classList);
[]Conclusion
Once you understand what the Document Object Model is and are familiar with the JavaScript methods that interface with the DOM, you are ready to start manipulating DOM elements with JavaScript. This guide showed you how to use several DOM methods and properties to add and remove elements from the DOM. You also learned how to use specialized properties to assign and update a DOM element’s CSS styles.
More Information
You may wish to consult the following resources for additional information on this topic. While these are provided in the hope that they will be useful, please note that we cannot vouch for the accuracy or timeliness of externally hosted materials.
This page was originally published on
